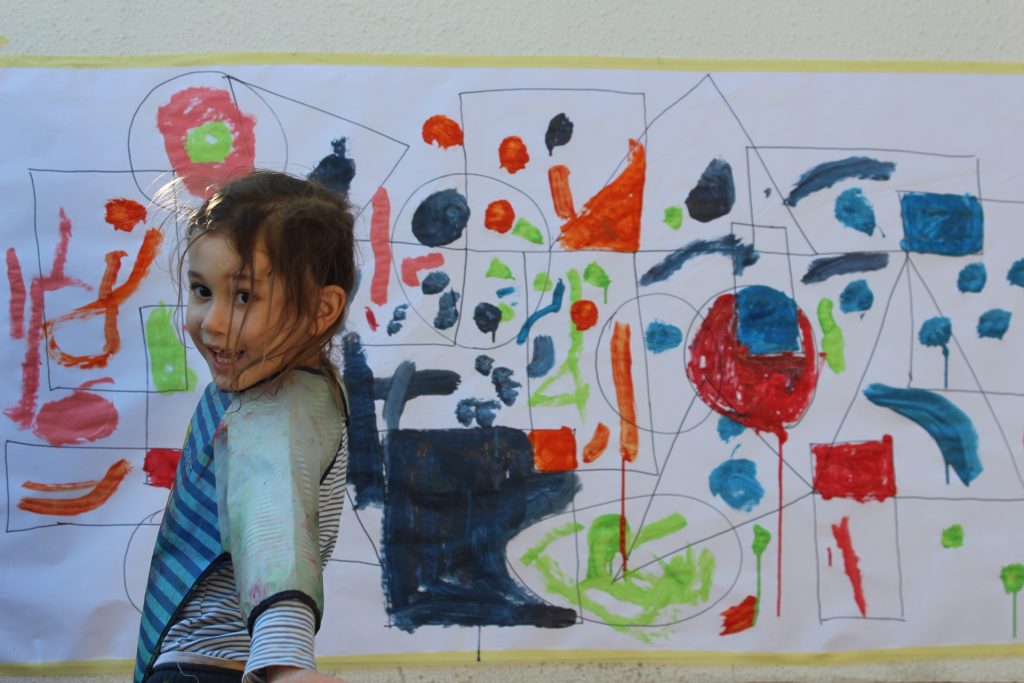
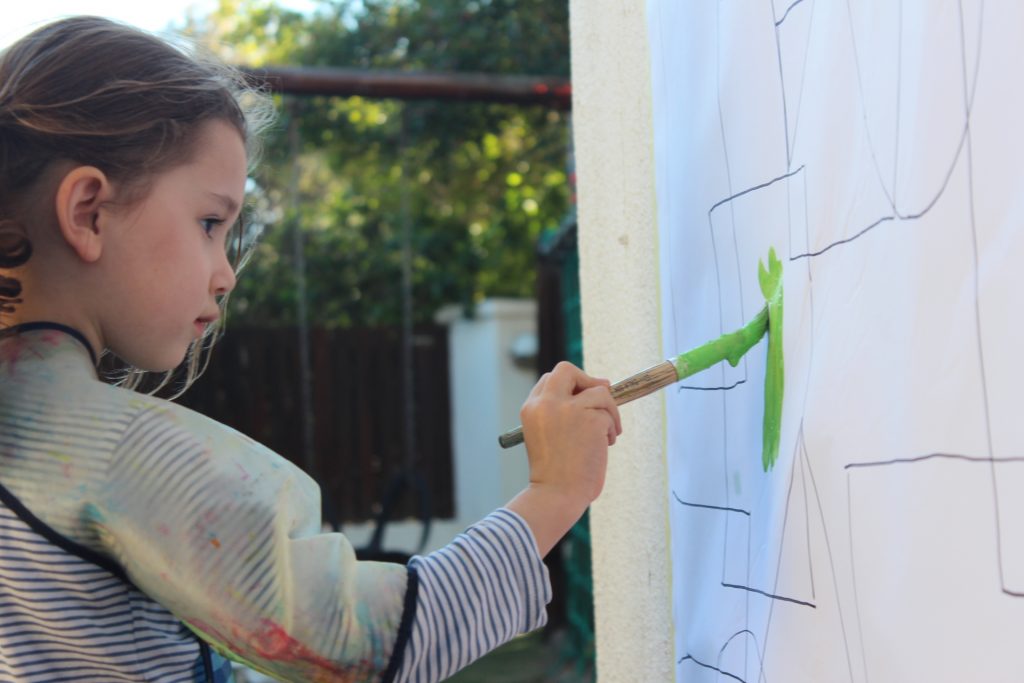
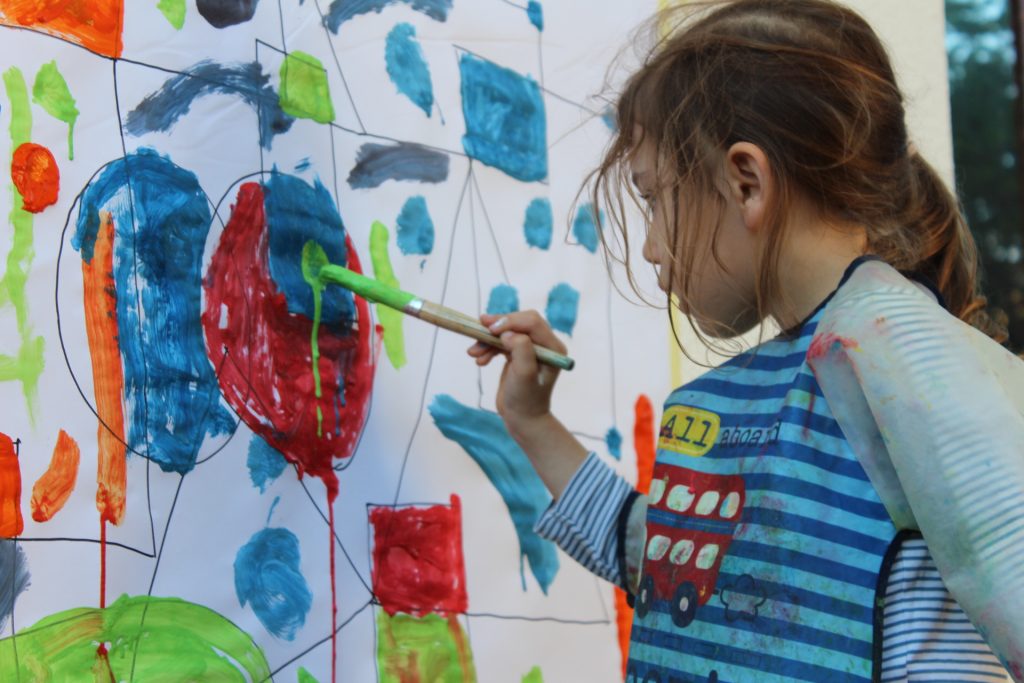
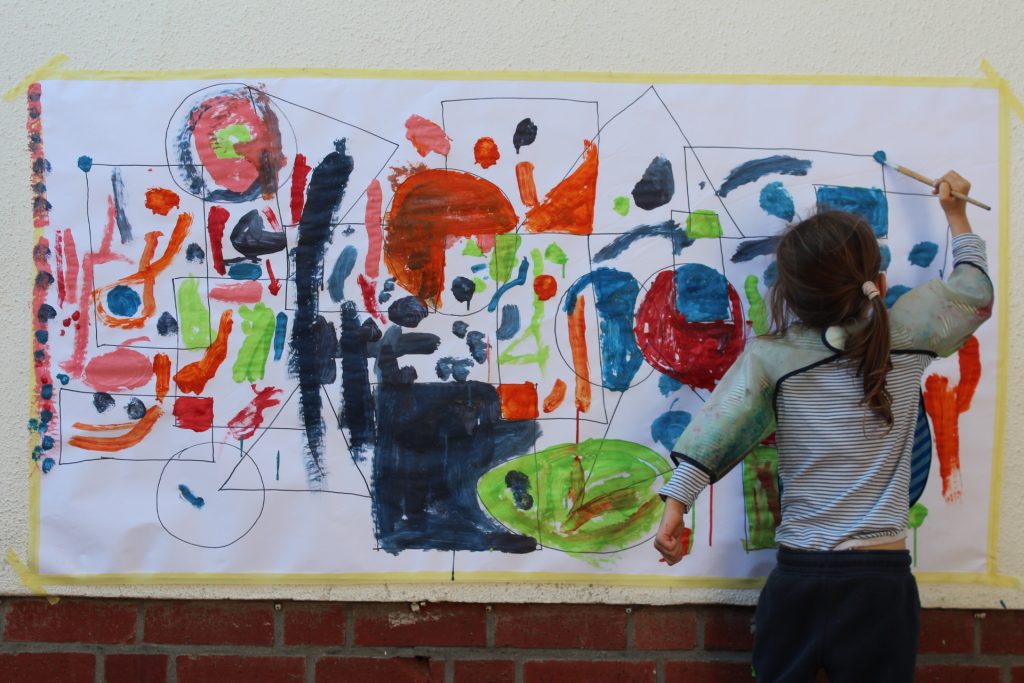
The study of shapes is in fact early geometry. At this age, children do not work with formulas for diameters and circumferences, but rather with identifying basic shape names and comparing, sorting, classifying and drawing them.
Here we are combining an art activity that uses whole arm movements (gross motor) to explore various shapes on a vertical surface.
Take a large piece of paper and draw lots of different overlapping shapes. Tape it onto a wall and invite your child to paint in the shapes in any way they would like.
This is a wonderful way to work on crossing the mid-line, developing upper arm strength, shape recognition, colour recognition and the mixing of different colours and creative expression!
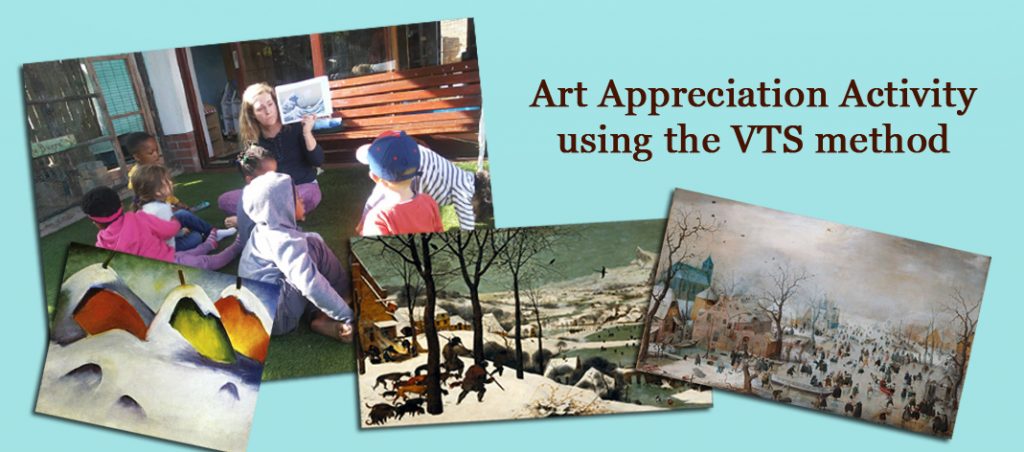
Art appreciation forms an important part of many early childhood curriculum guidelines as a way to inspire and stimulate interest and understanding in a variety of art forms as well develop a visual vocabulary.
For this week’s Winter Themed curriculum we encourage you to snuggle up with your child one of these wintery days and take some time to develop those visual discriminatory and language skills, observing and discussing art using the VTS method described below.
VTS METHOD Utilising the “visual thinking method” developed by VTS (Visual Thinking Strategies) ask your child 3 simple questions:
1 -“What’s going on in this picture?” 2- “What do you see that makes you say that?” 3- “What more can we find?”
This amazing method develops observation skills, critical thinking skills, language skills and visual literacy skills. When we have utilised this method here in the preschool, even the 2 year olds had something to say about the art we were discussing!
Vocabulary is then also further developed as the teacher/parent repeats and elaborates on the child’s observations.
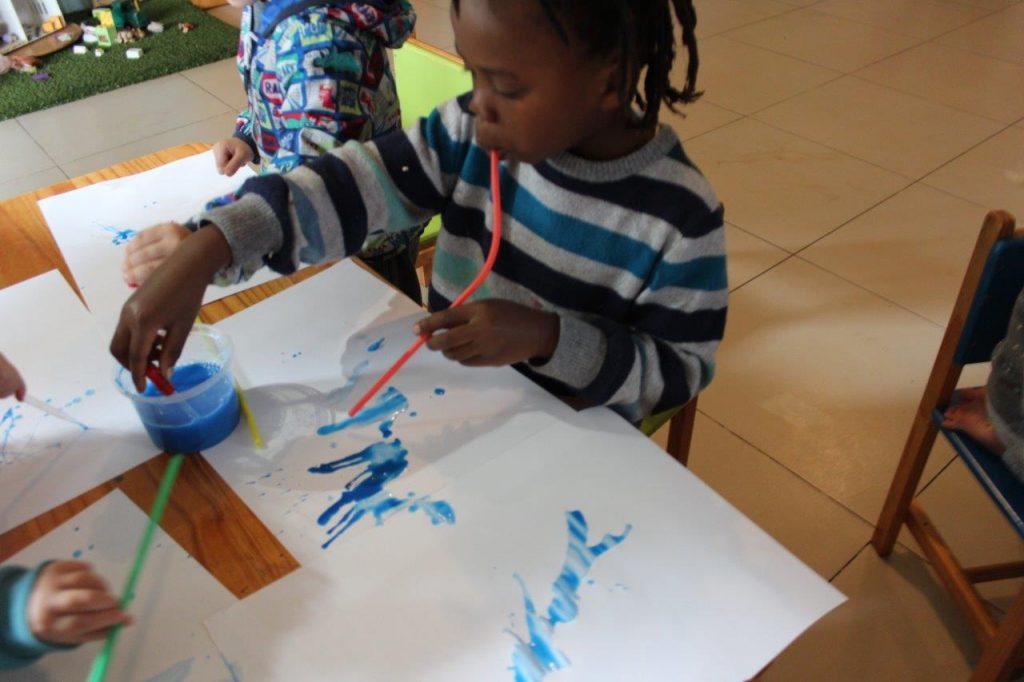
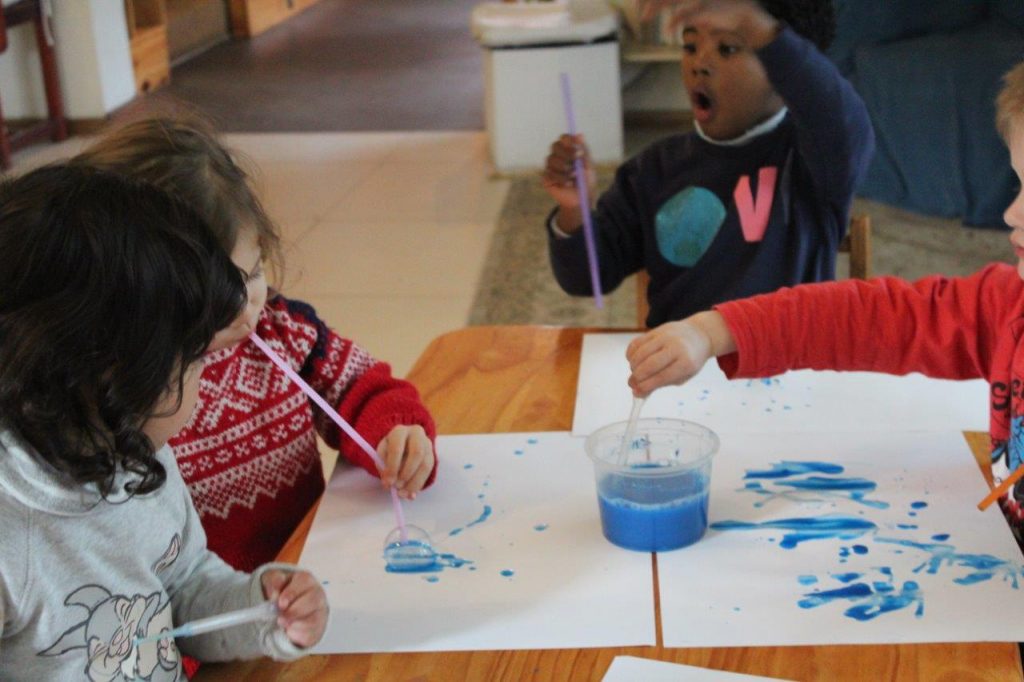
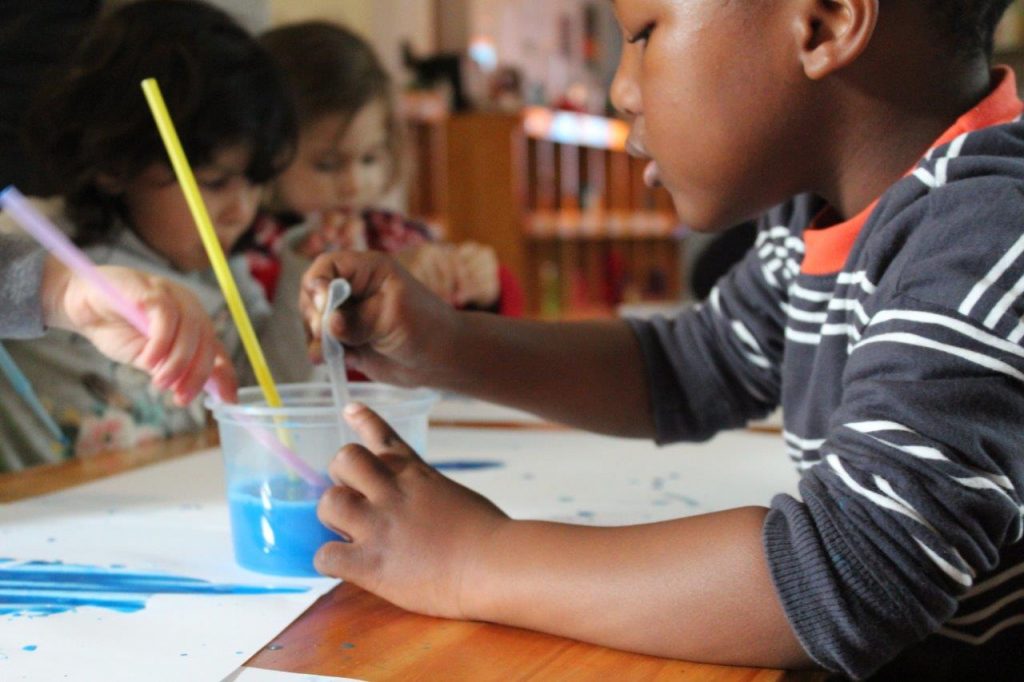
Here is a really fun rain and wind activity that we have done at the Watering Whole in the past. This art project is process based! Meaning that it is all about the EXPERIENCE of creating rather than the end product!
Needless to say we had a lot of fun creating raindrops with our droppers (great for fine motor development) and making wind with our straws (great for breath work).
All you need is some paper, thin blue paint, droppers and straws…the kids will do the rest!!
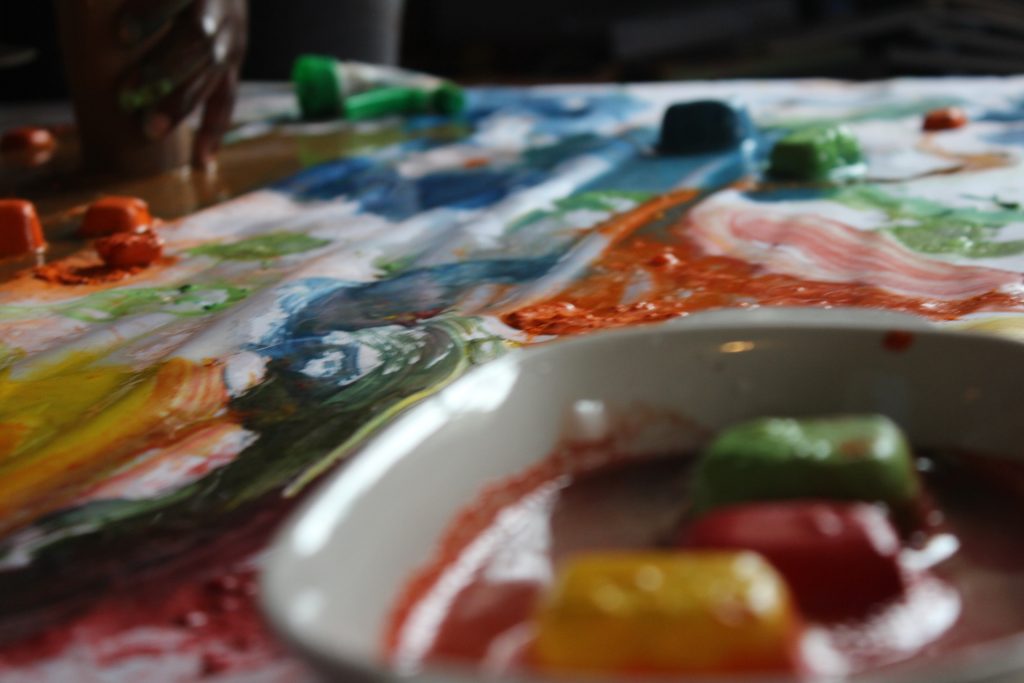
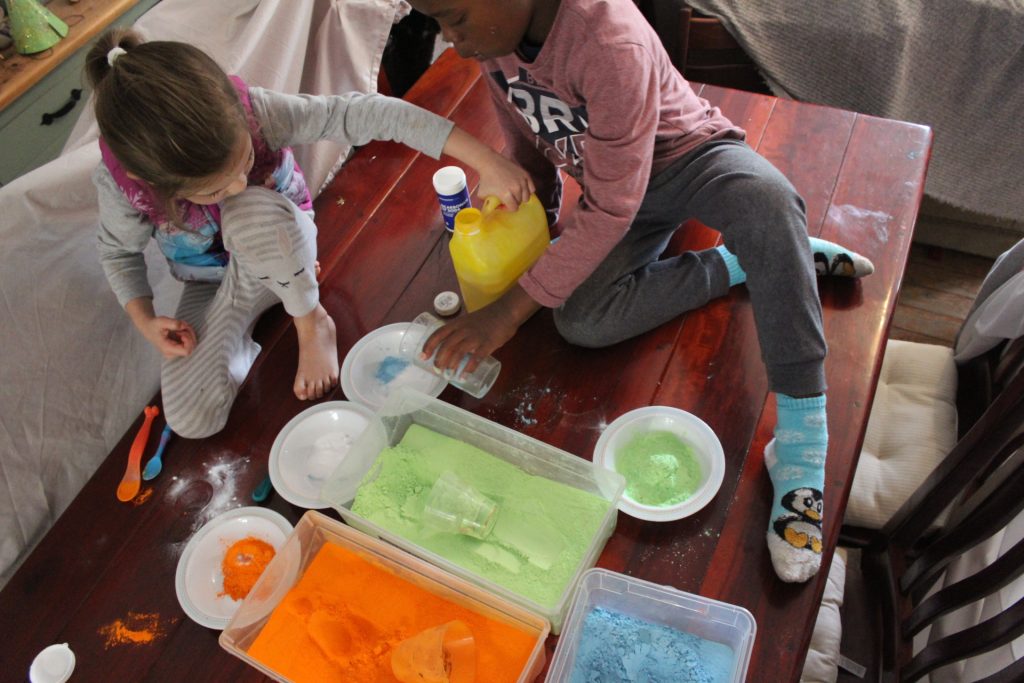
Where would preschool science be without bicarb and vinegar! Here is a wonderful science and art experiment that will: teach your child about all the colours of the rainbow, help them learn about colour mixing and learn about chemical reactions (i.e. when bicarb and vinegar mix they create the gas carbon dioxide which makes a bubbling and fizzing reaction). It is wonderful for developing observation skills and is sensory rich as the children see, smell, touch and hear the fizzing of the rainbow….and it makes a beautiful rainbow painting too!
Directions:
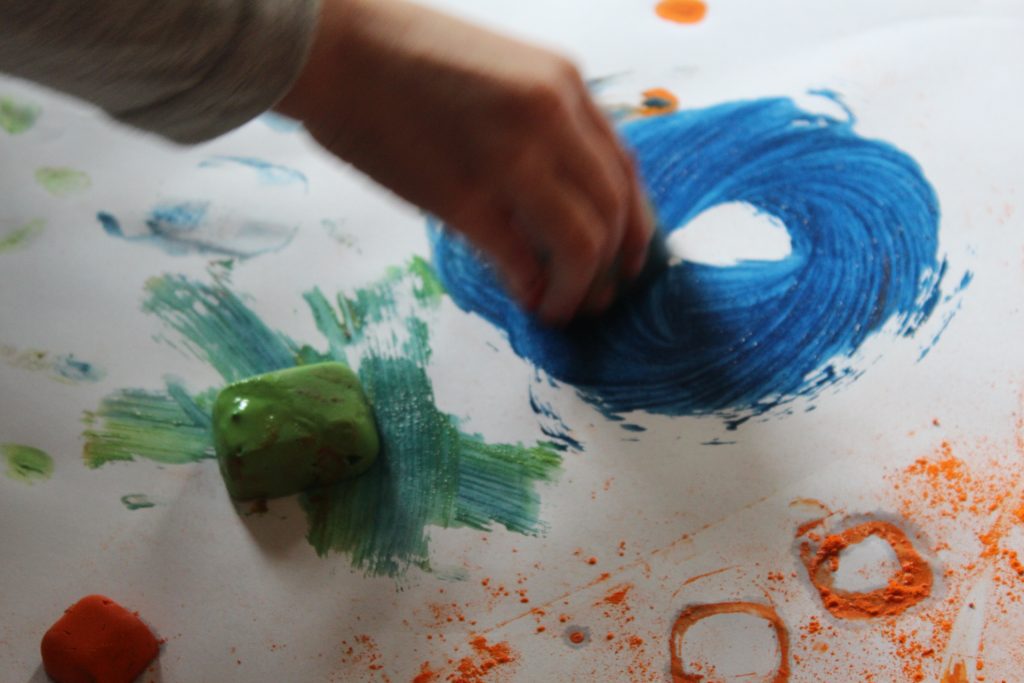
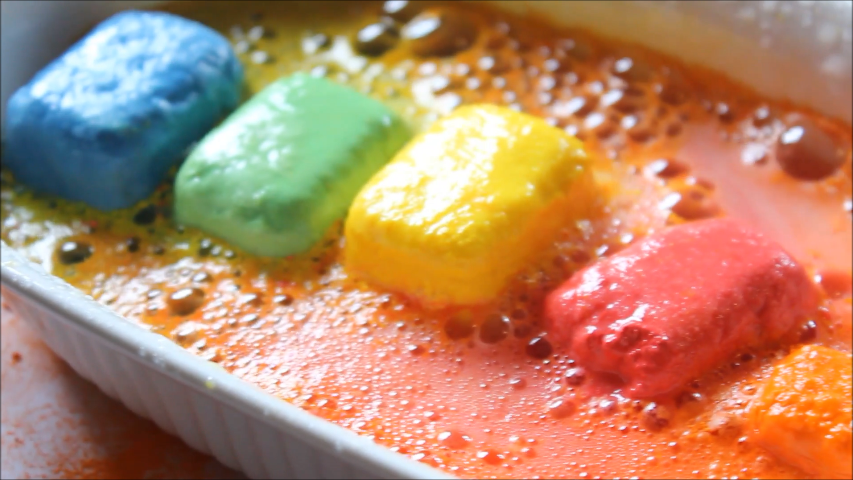
Mix together: 3 tablespoons of bicarb, 4 tablespoons powdered paint (each separately: red, orange, yellow, green, blue, purple), add some water so it becomes a liquid paint. If you don’t have powdered paint you can just use liquid paint and mix in a few tablespoons of bicarb.
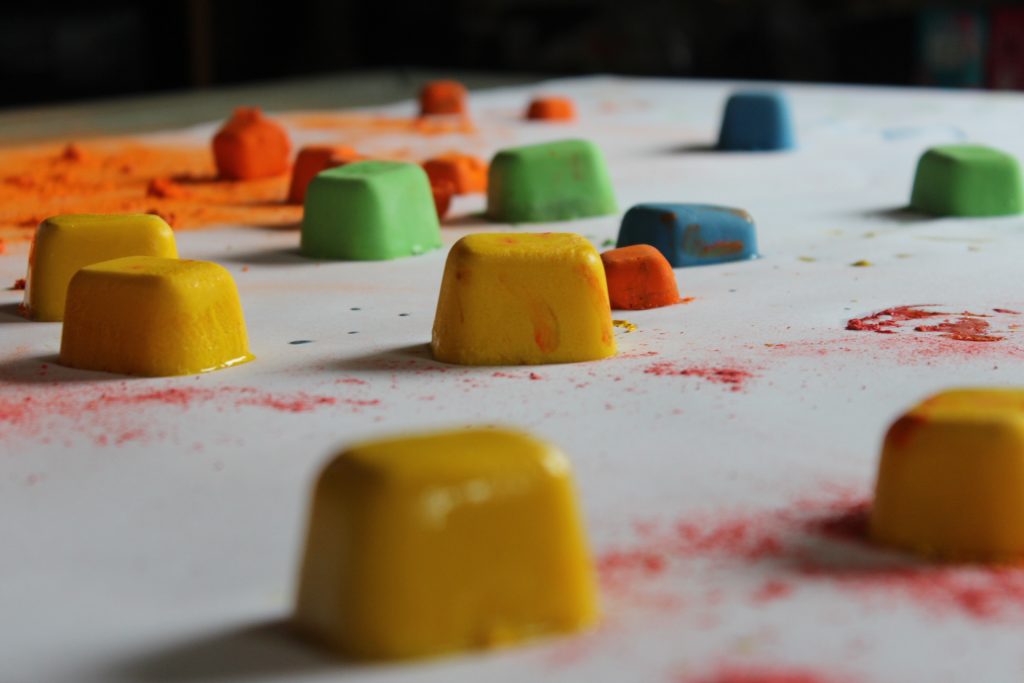
Freeze the coloured water bicarb mixture in an ice cube tray
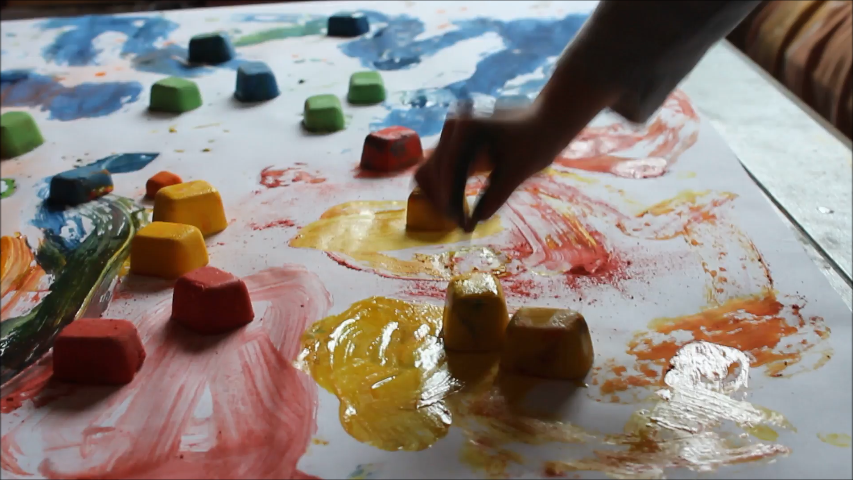
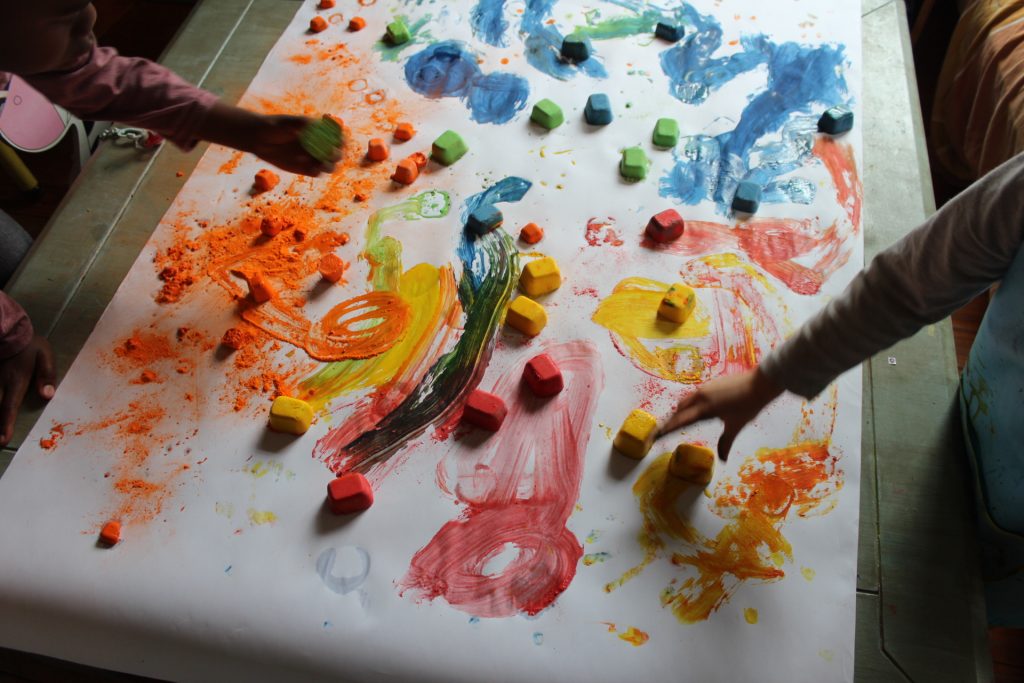
Once frozen, bring out the coloured cubes and lay them on a large sheet of paper.
Invite your child to paint with the ice cubes as they start to melt and make beautiful colours on the paper. We put on some rainbow themed music too.
Next put a row of your ice cubes in a shallow dish and invite your child to spray and squirt vinegar onto the ice cubes and watch them fizz….
Ask them about the colours they see, what they smell and hear, how the ice cubes feel, what they think will happen, etc, so you can help them to develop observation, prediction and language skills.
Did you know Hippopotamus comes from the Ancient Greek ‘river horse’? The hippopotamus is semi-aquatic, inhabiting rivers and lakes. They will remain in the water and mud throughout the day to keep cool and at dusk they will emerge to graze on grass.
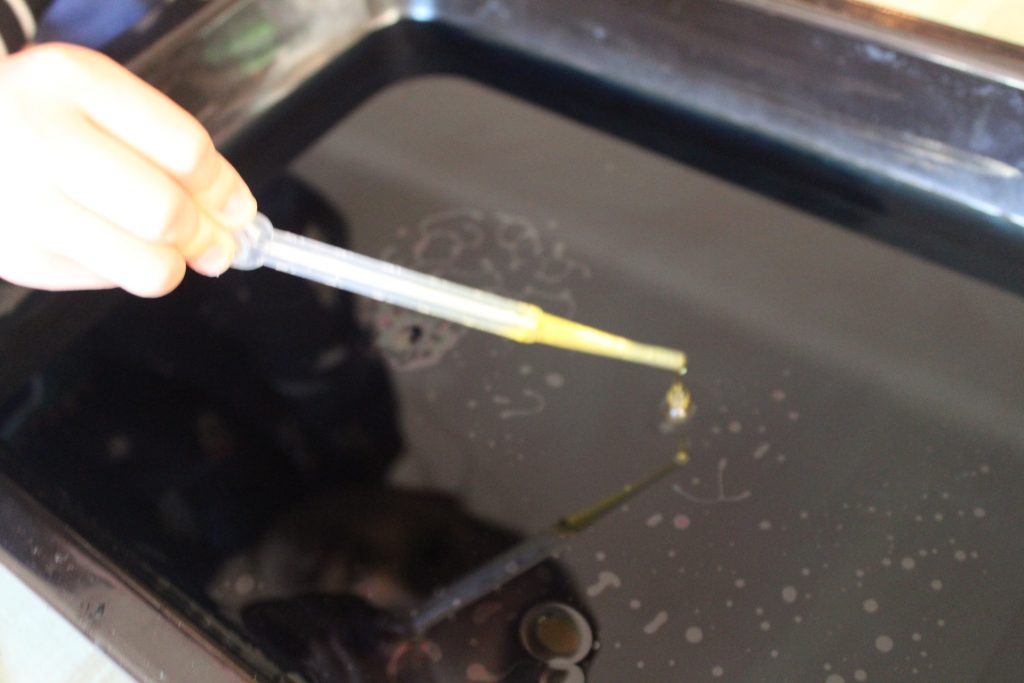
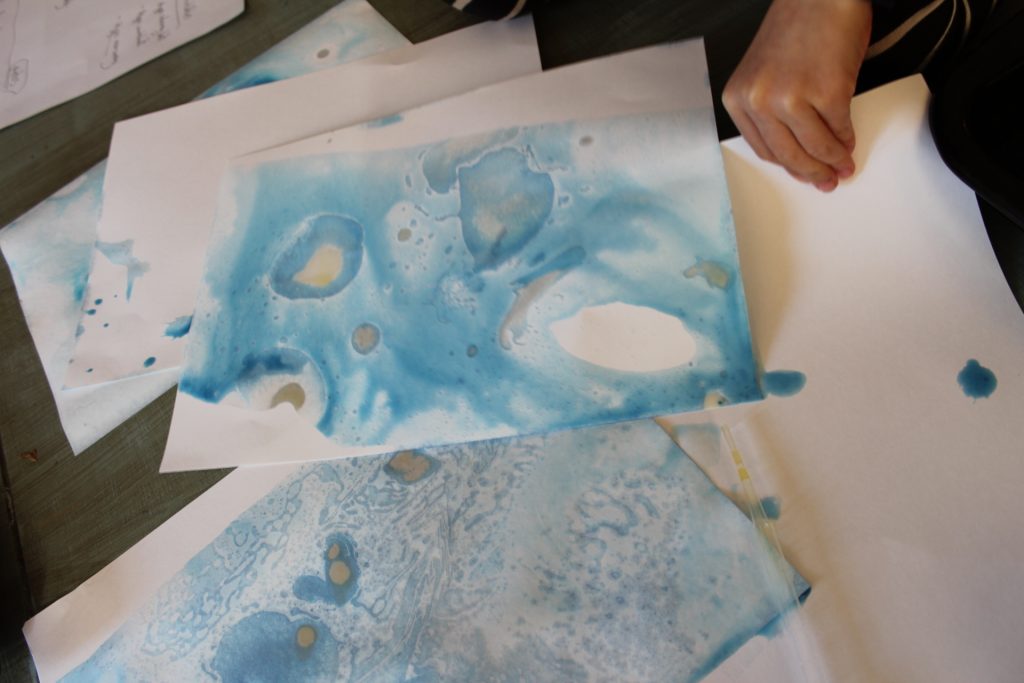
This week we are combining art and science to create beautiful oil and water paintings.
You will need: • shallow baking dish with a layer of coloured water (use a few drops of food colouring) • cooking oil in a small bowl • heavy paper or card • eye droppers/pipettes – wonderful for some fine motor work.
Directions: Invite your child to make a few drops of oil in the water using an eye dropper/pippette
Gently lay a sheet of paper on top just for a moment and then remove to dry.
The effect… a beautiful marble-like picture. The science…. Oil and water don’t mix because water molecules are polar and oil molecules are non-polar. In the baking dish you will notice that the water molecules will pull towards one another and the oil the same. Oil is also less dense than water so it will float on the surface of the water.
Did you know there are many different kinds of birds, most can fly, but some (like penguins and ostriches) can not. One thing that all birds do have in common is that they lay eggs!
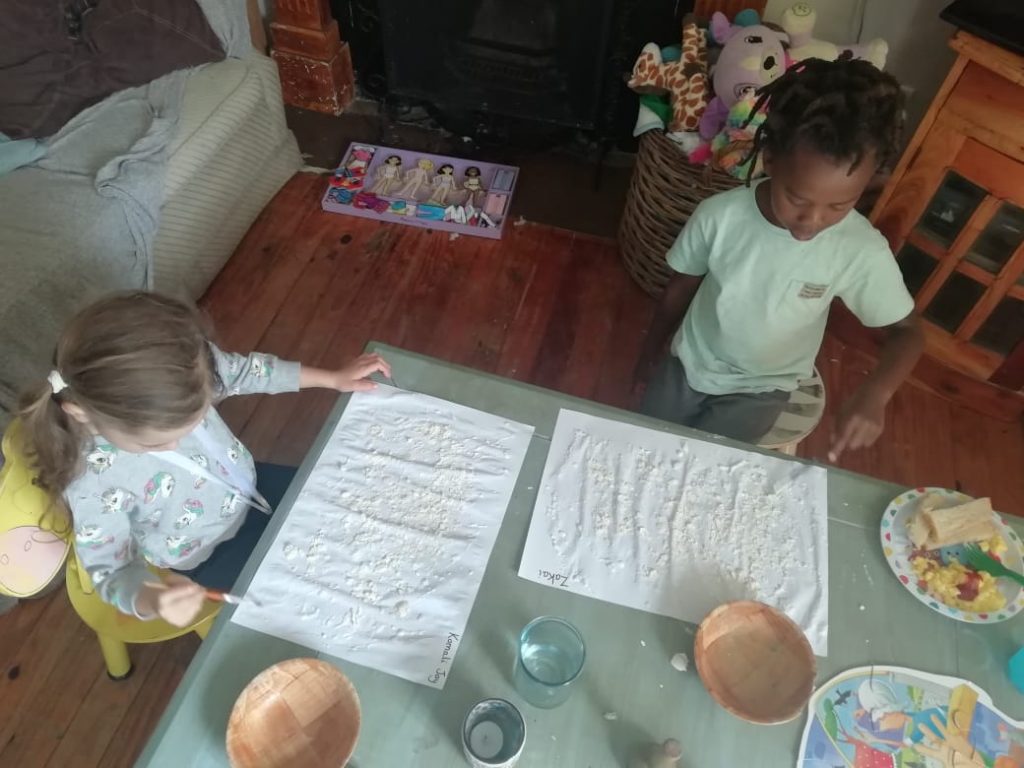
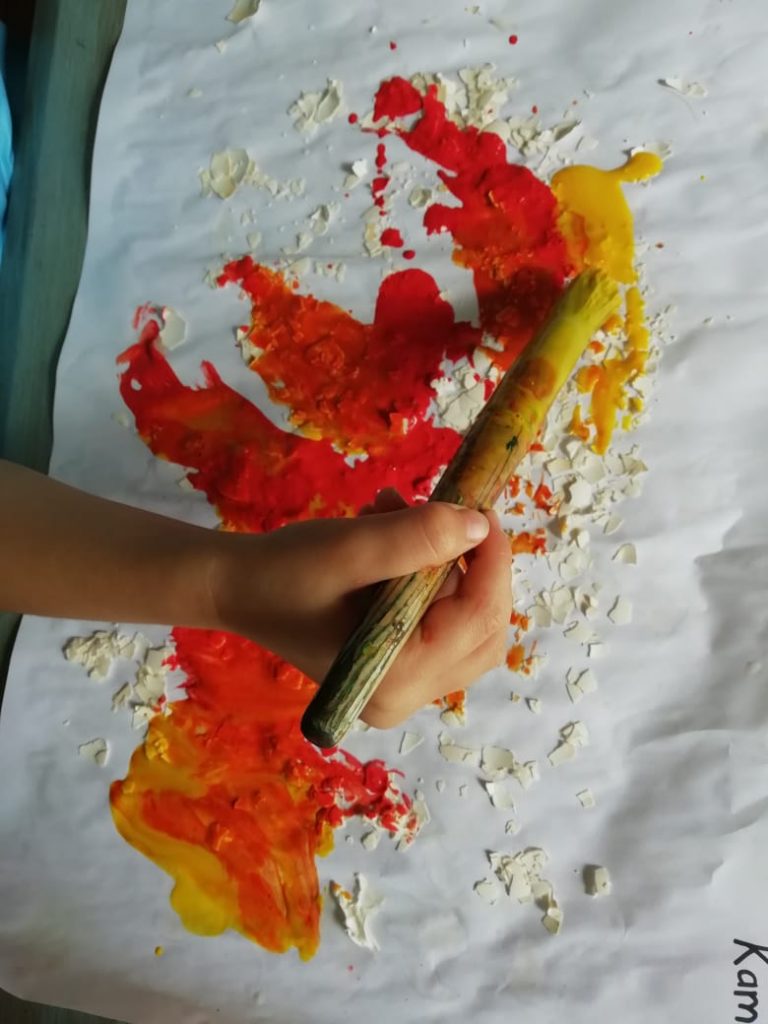
This week we are exploring the colour orange by mixing yellow and red and we are also crushing egg shells to make our own art.
Benefits include: Fine motor development through crushing egg shells and painting, learning about colours and colour mixing, developing curiosity and creativity.
Instructions
Rinse and then bake your egg shells for 20min at about 100 degrees.
Invite your child to crush the egg shells with a pestle and mortar or something similar, paint a piece of paper with glue and then sprinkle on the egg shells.
Once this is dry invite your child to paint over the egg shells with yellow and red paint.
Talk about the texture of the paper and the colours that you see!
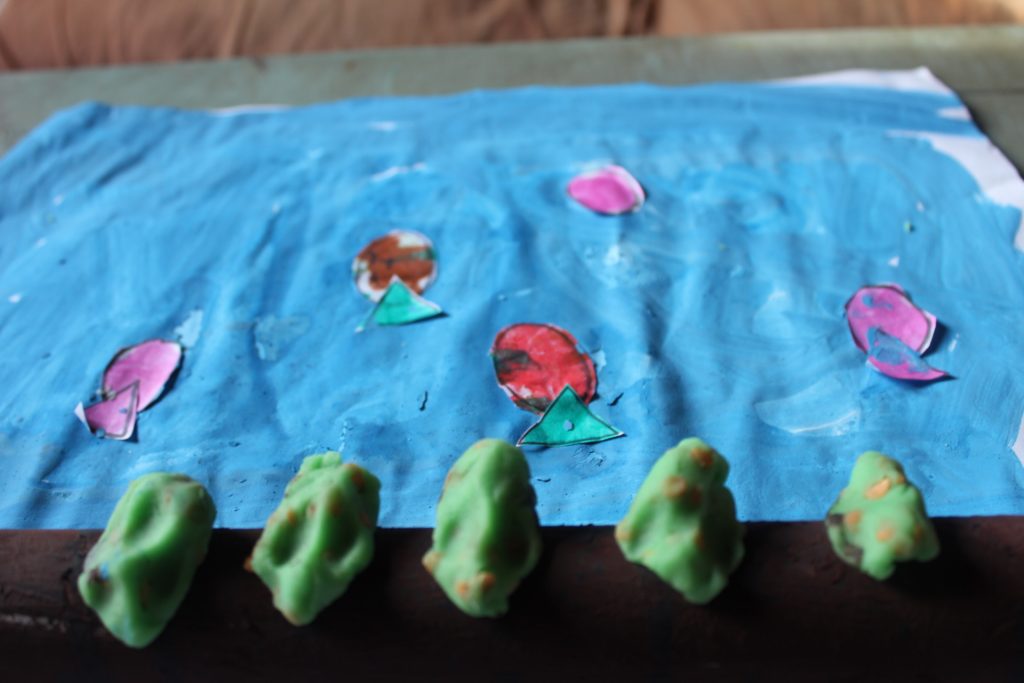
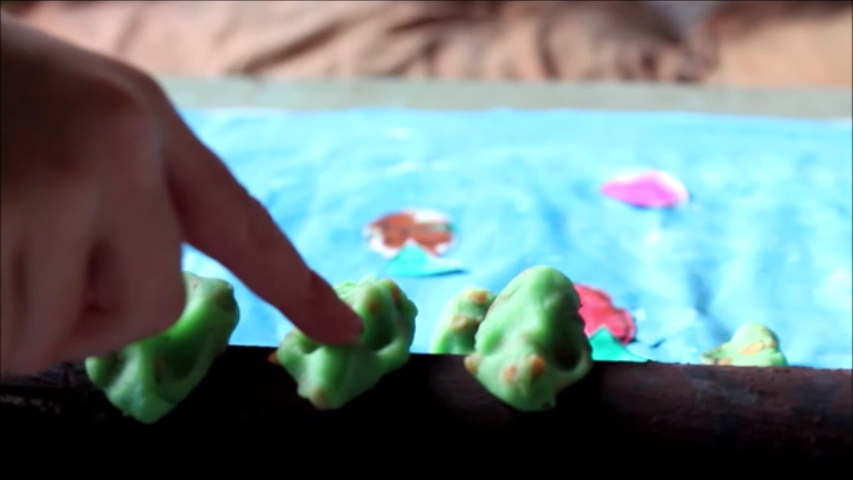
Five little speckled frogs sat on a speckled log Eating the most delicious bugs — YUM YUM! One jumped into the pool, where it was nice and cool Then there were four green, speckled frogs. Ribbit! Ribbit!
Did you know…..? Counting rhymes like this one help to develop a solid foundation in early maths skills such as counting, addition, subtraction and one-to-one correspondence skills which involve counting each object in a set only once, with one touch per object.
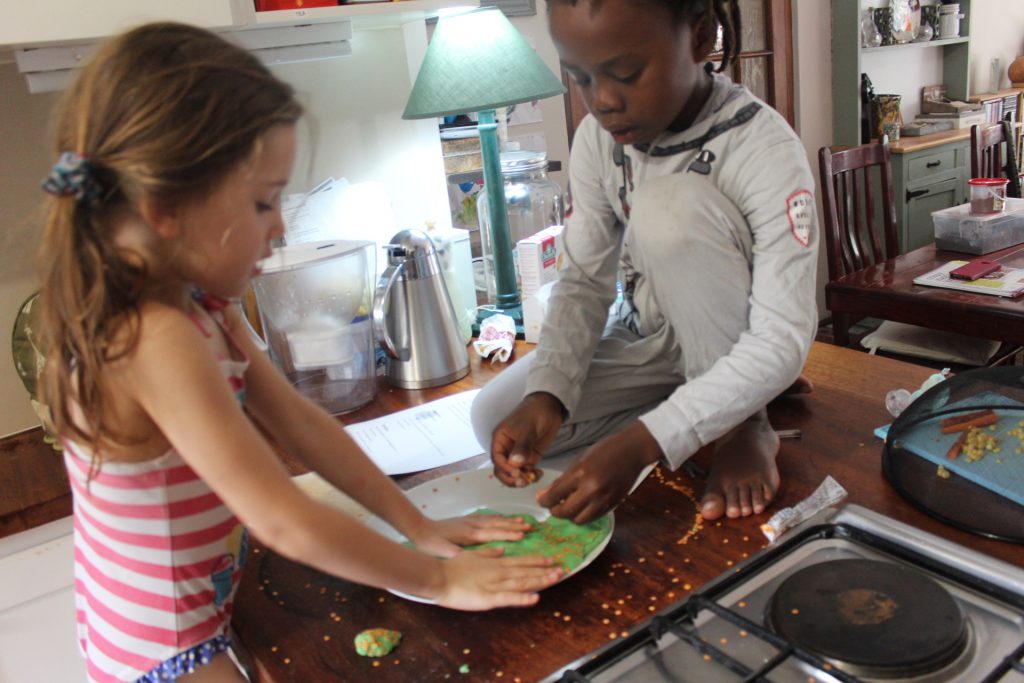
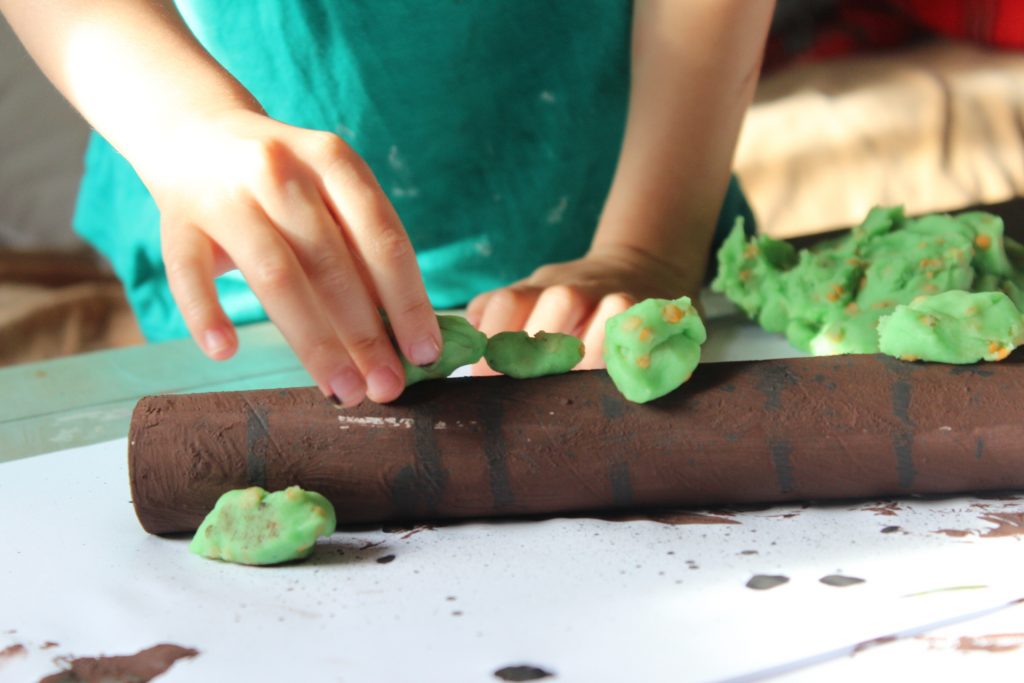
When children have opportunities to touch and manipulate objects as they learn, they will create meaningful connections in their brains that stick…Let’s have some hands on learning fun by creating some of our own speckled frogs. Manipulating dough is also absolutely wonderful for working all the muscles in your child’s hands and fingers important for writing skills later on.
Materials needed:
1 Cup Plain Flour ½ Cup Salt 2 Teaspoons Cream of Tartar 1 Tablespoon Oil 1 Cup warm water 2 Tablespoons Green Food Colouring ¼ Cup red lentils
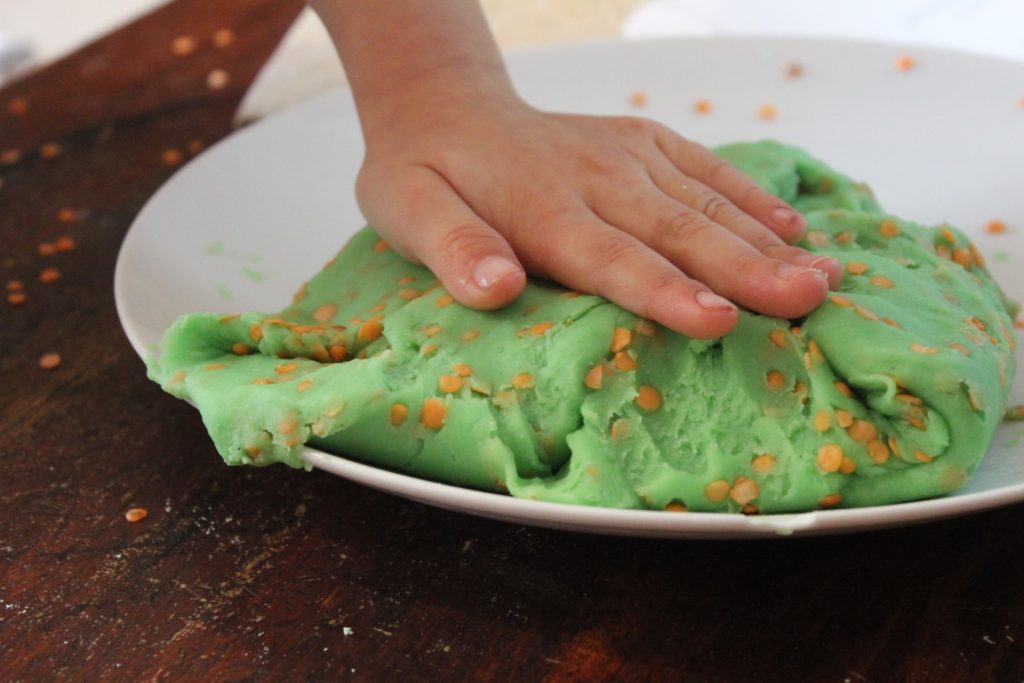
1.Pour all dry ingredients, flour, salt and cream of tartar together in a saucepan. 2.Add water, oil and food colouring to dry ingredients. 3.Whisk before heating to remove any lumps. 4.Cook over medium heat, constantly stirring until it becomes a thick blob. 5.Then turn out onto a clean surface and knead into a smooth ball. Be careful the play dough will be very hot! Use a little bit of flour if the play dough is sticky. 6.When the play dough has cooled, gradually fold and knead in the yellow split peas/lentils 7.Store in a plastic zip lock bag or air tight container.
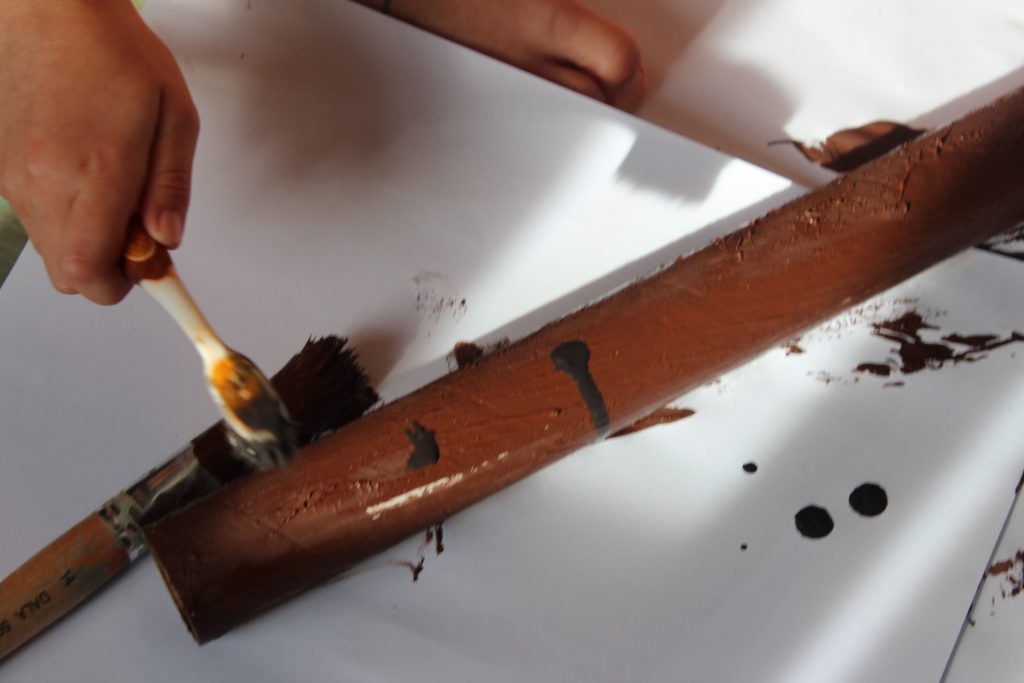
Now create your scene. We painted a brown paper towel roll as our log and we used the blue fishy painting from our week 4 curriculum as our pond!
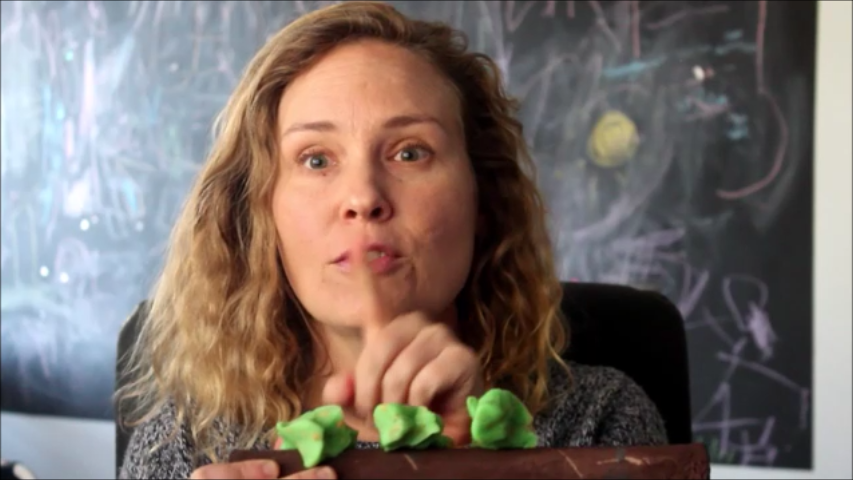
Mold your frogs into little balls and even add googly eyes if you have some! Have fun playing, singing and counting with your child as you explore together.
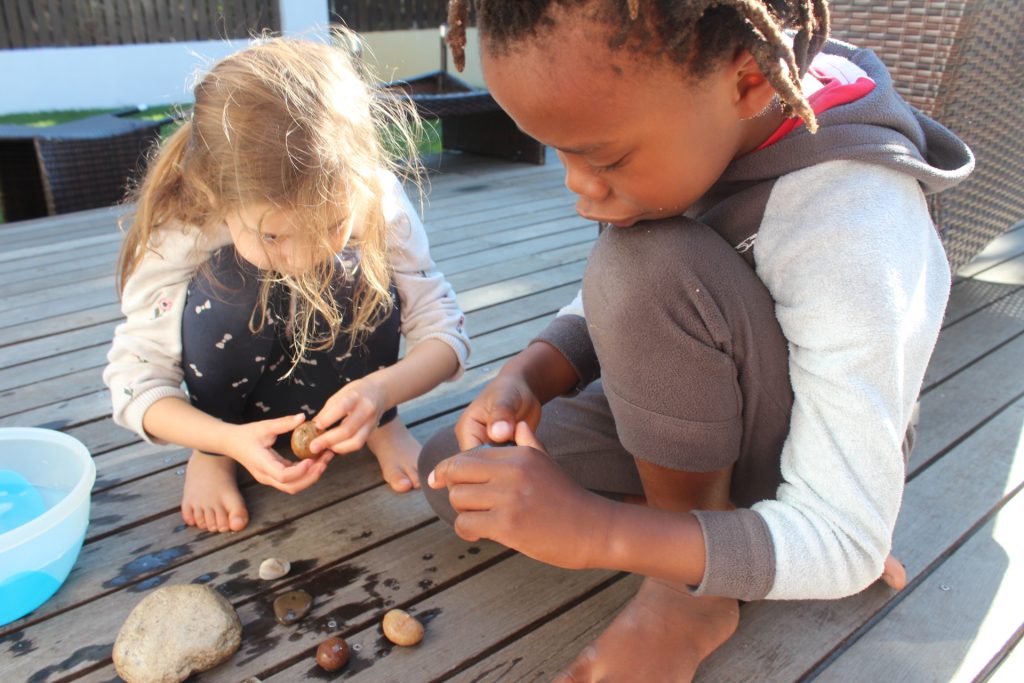
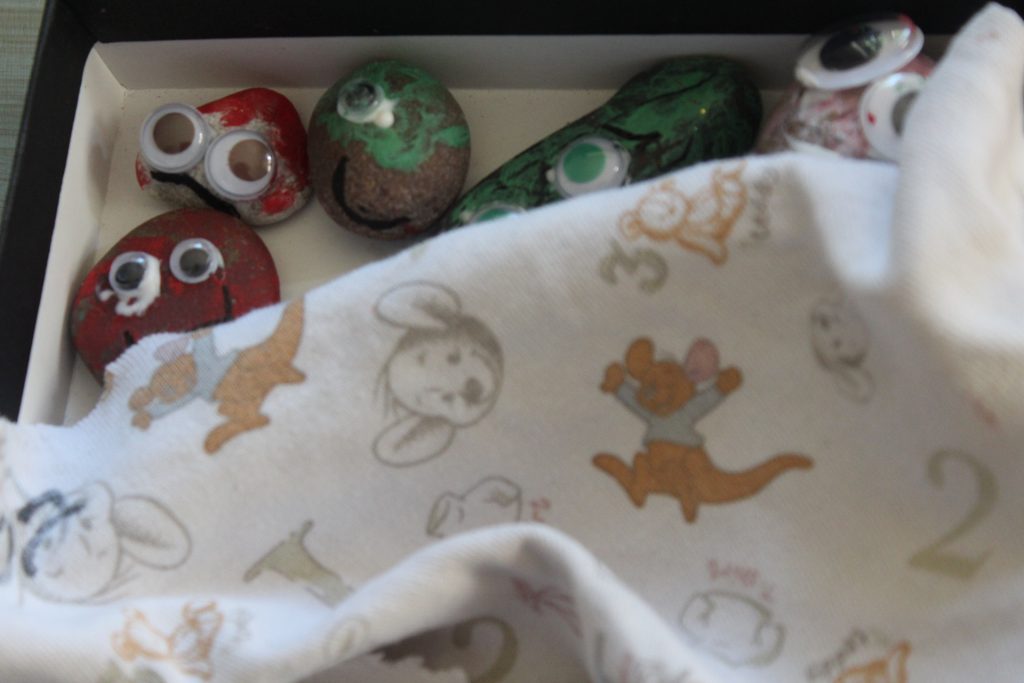
In this week’s story Eddy Elephant really wants a pet and Peter Puppy shows Eddy some of his wonderful pet rocks! This week we invite our Watering Whole families to create some pet rocks of their own.
Pet rocks are a wonderful way to teach responsibility as well as ignite the imagination and cultivate creativity.
Step 1:
Spend some time in your garden searching for the perfect rocks that would make wonderful pets. Learn all about size, shape, texture and colour as you explore!
Step 2:
Clean and dry your rocks before you start to paint them. Sort the rocks in different categories…which ones are smooth, which ones are rough, which one is the biggest, which one is the smallest etc.
Benefits include helping children develop visual acuity and have a better understanding of comparisons/differences and patterns which are an important foundation for both language and maths.
Step 3:
Choose different colours for your different pets and add googly eyes or paint on some eyes of your own. You could choose to create different rocks with different feelings here too. Ask your child do you think this pet is feeling happy or sad… angry or scared? And draw on the different feeling expressions (see the feeling buddy lesson from last week for the feeling buddy expressions)
Step 4:
Name your pets! This can be a really fun game as your child comes up with different names and personalities and stories about their pets…what they like, what they are afraid of ,etc… A child can process so much of their own experiences, through stories they create around toys, pets and games which plays a crucial part in early development.
Step 5:
Create a home for your pets. This could be a shoe box or a basket, a nest or a doll house… Get creative and talk to/ask your child about all of the important care that pets need such as shelter, food, water, love, etc.
Kamali had so much fun creating a bed for her pets, feeding them and looking after them 🙂
This week for our process based art we are going to have some fun exploring different shades of blue for our ocean and then work on some gluing and sticking skills with the shapes OVAL and TRIANGLE for our fish.
Create your art space with a white sheet of paper, some blue paint and some white paint and invite your child to paint the ocean with you.
Once the ocean has dried invite your child to stick on the oval and triangle shapes to make the fish swim in the sea. Remember to ask them about the shapes they are using to make their fishes.
Colour mixing. Now that we have learnt about our 3 primary colours….let’s do some experimenting together!
Set up a space for your child to explore the 3 primary colours only. Have blue, red and yellow paints.A blank sheet of paperAnd different painting tools such as brushes, sponges, sticks, feathers etc You can start by pointing to and talking about the different colours together. Then allow the children to explore on their own and find out all of the new colours they can make. Talk to them about what you see and ask questions too…”What colour are you using now? What happened when those colours mixed? I see you are making a yellow circle…etc”
Note… you may find it starts off as a beautiful picture of vibrant colours mixing together….once over mixed it will look more like a big muddy puddle 🙂 That is okay. This activity is about allowing the child to explore colours and colour mixing in their own unique and playful ways! The product is not as important as the process in this activity.